Introduction
FunWithCode is a programming course designed to make learning how to code easy and fun. This course will introduce beginners to the fundamentals of computer programming. It will also teach you how to break a large complex task into many small simple tasks – thus making the task much easier than what it is. By the end of this course you will learn how to code a fully working MegaBall game.
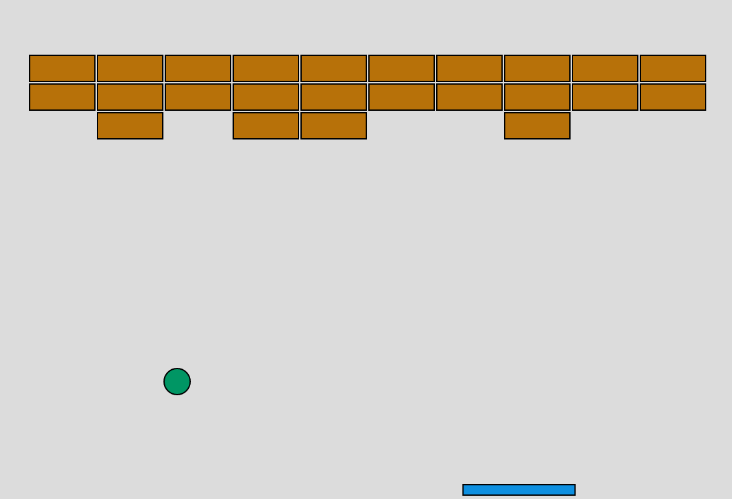
MegaBall Game
You will learn coding in a computer language called P5JS . It is very similar to the Java programming language. P5JS is a computer language for animation
What is a computer program?
A computer program is a set of instructions for the computer to perform or execute 1 after the other to accomplish a particular task.
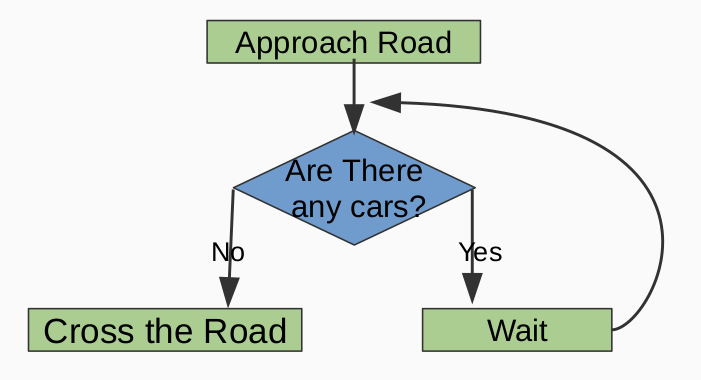
Program to Cross the Road
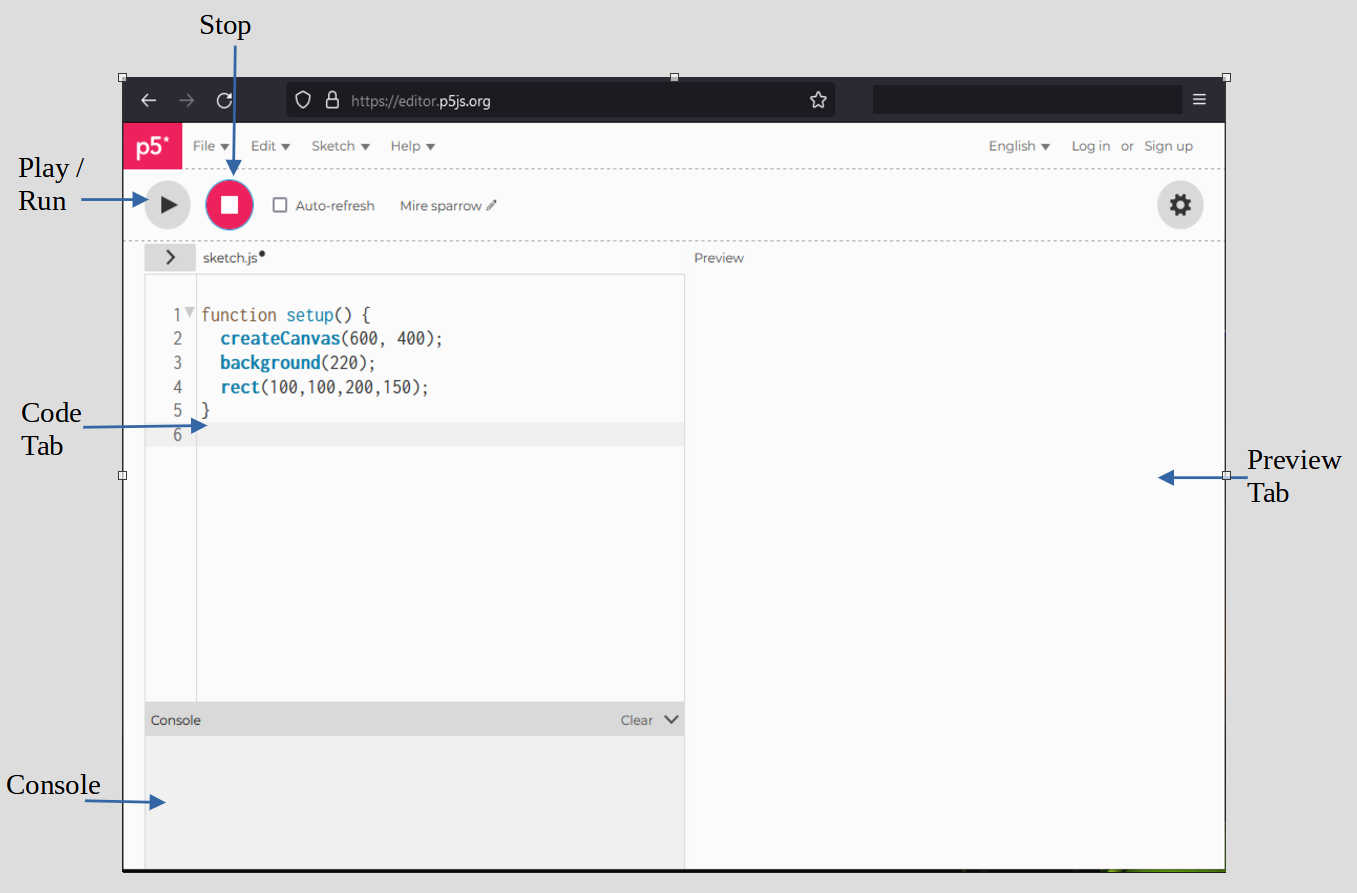
Getting Started with P5JS - ( parts of the Editor )
Open your favourite Browser and type https://editor.p5js.org in the address bar.
Your first program or sketch
Sketch 1
|
1 2 3 4 5 |
function setup () { createCanvas (600,400); background (220); rect (100,100,200,150); }
|
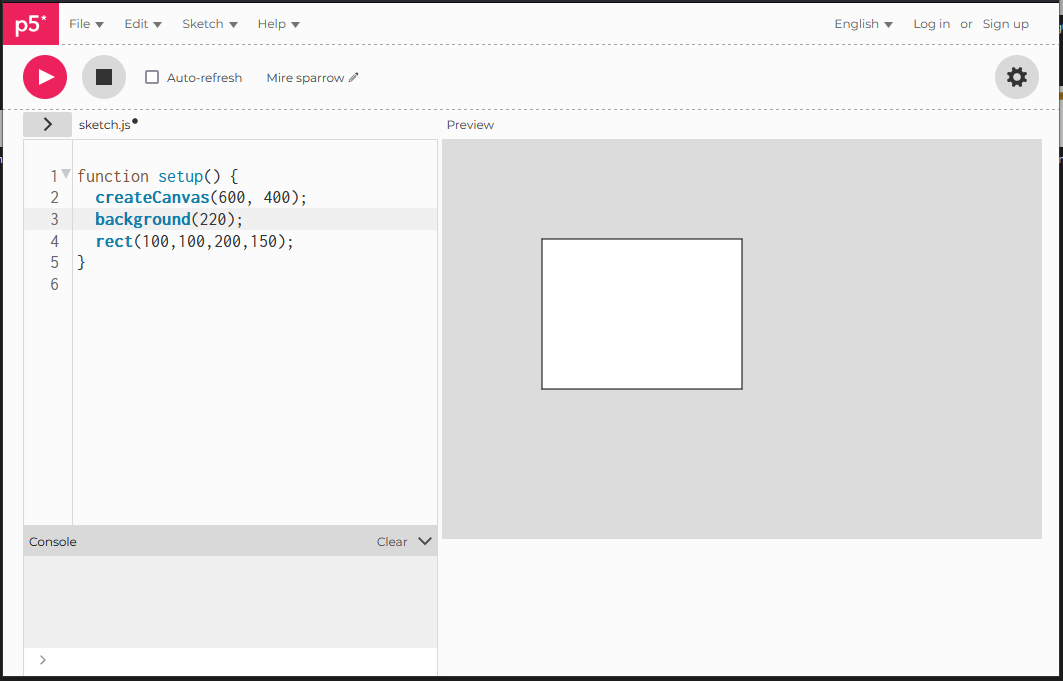
A processing program is known as a sketch. A sketch contains 1 or more commands. Commands are instructions for the computer to execute. A command is followed by round brackets ‘()’ and ends with a semi colon ‘;’ . The above sketch contains 3 commands
Commands may have to be passed extra values between the round brackets known as parameters separated by a comma
For example the createCanvas() command is passed 2 parameters : the width – 600 and height – 400 of the canvas.
Note: Commands have to be grouped inside the setup() function between the curly braces ‘{‘ and ‘}’. For now we will code only inside the setup function. Delete the draw() function inserted by the P5JS editor.
Type the above code (sketch 1) in your Processing editor.
Run the code by clicking play. Alternately you can also press Ctrl + Enter on the keyboard
You can stop the sketch by clicking Stop
Go ahead change the values of the parameters and see what happens. Change the width and height of the canvas by passing different values to the createCanvas() command
Note : Processing is a case sensitive language. This means capital ‘A ‘ (upper case) is not the same as small ‘a’ (lower case).
Comments
Your code can also contain comments. Comments are preceded with 2 slashes. In the sketch below, lines 2, 4 and 6 are comments. Comments are ignored by the computer when the sketch is executed by the computer. Programmers use comments to describe their code.
Sketch 1
|
1 2 3 4 5 6 7 8 |
function setup () { // set the size of the canvas createCanvas (600,400); // fill canvas with colour background (220); // draw a rectangleprocess rect (100,100,200,150); } |
Login to P5JS
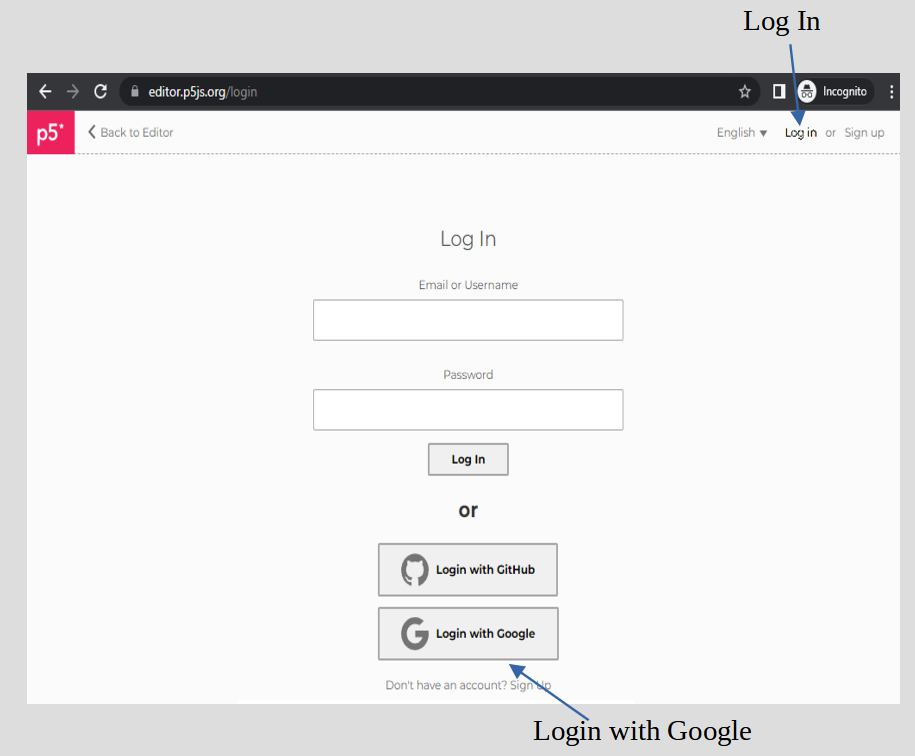
If you want to save your sketches you need to Login to P5JS. Click the Log In link at the Top Right and then click login with google to sign in to P5JS
Rename your sketch
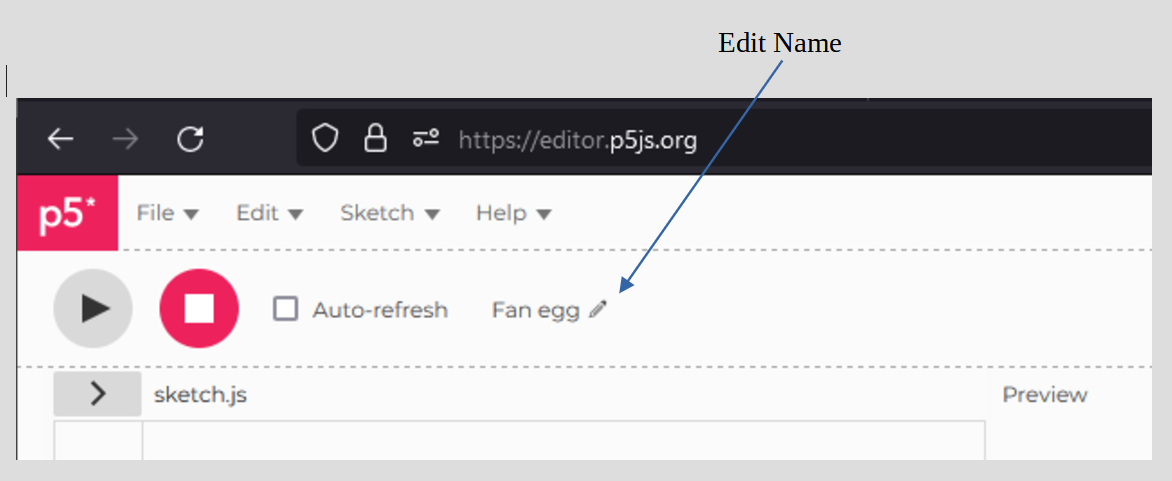
Click on the pencil next to the name of the sketch to rename the sketch. Go ahead rename your sketch to ‘day01_sk01’
Saving your Sketch
To save your sketch open the ‘File’ menu and click ‘Save’. Alternately you can press Ctrl + S on the keyboard.
Opening your saved sketch
You can open your sketch by clicking ‘Open’ from the File menu.
Making a copy of your sketch
You can make a copy of your saved sketch by clicking ‘Duplicate’ from the File menu.
The processing coordinate system
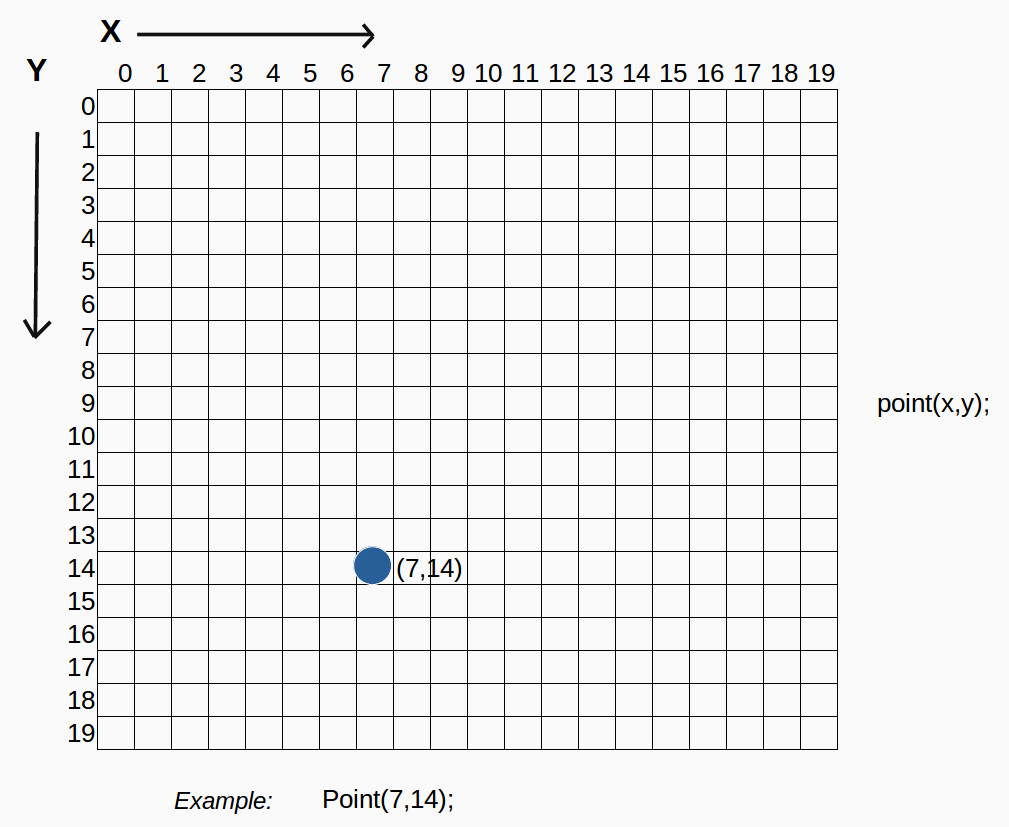
The canvas is made of tiny squares (invisible to the naked eye) called pixels . Every pixel has a horizontal position (on the X axis) and a vertical position (on the Y axis). See figure below. We can refer to a point on the canvas by specifying the X value and the Y value of the pixel. Below is a magnified image of a canvas that is 20 pixels wide and 20 pixels tall.
Drawing a line
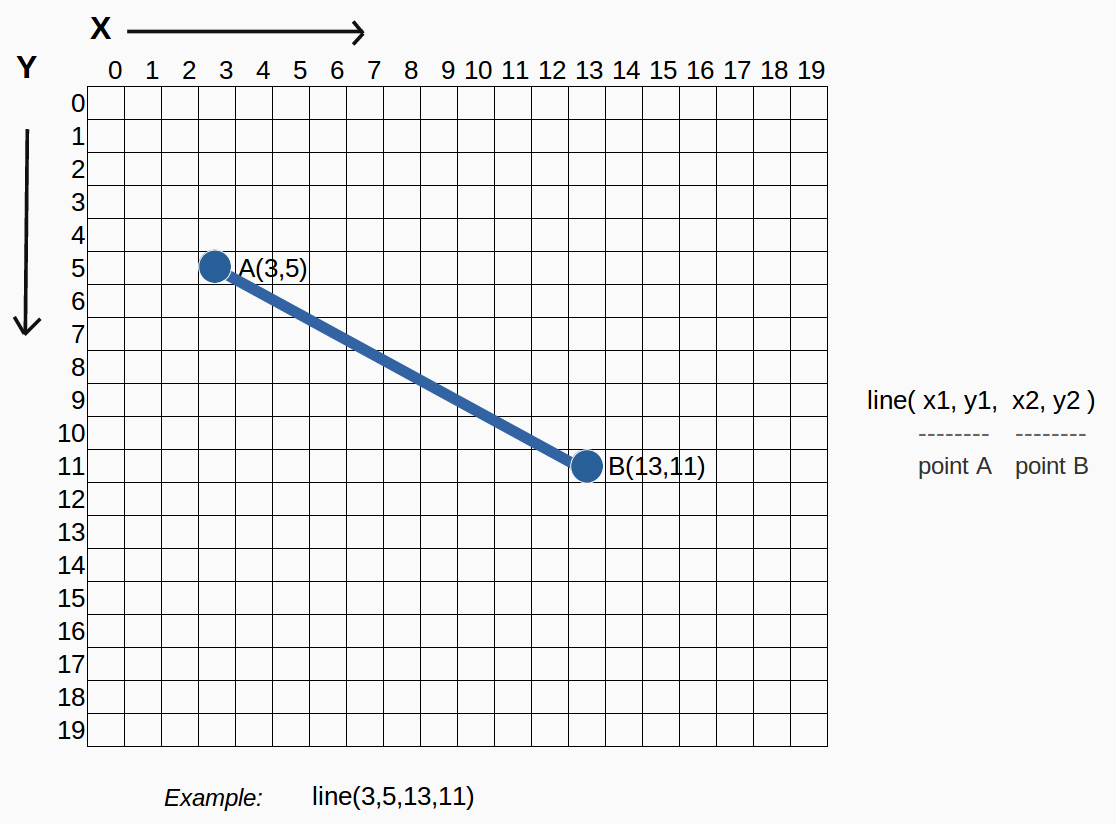
We can draw a line with the line() command. A line is between 2 points (see figure below).
1. The point where the line starts – point A
2. The point where the line ends – point B
So we have 1 set of X and Y values for point A and another set of X and Y values for point B
Therefore we have to pass 4 parameters to the line() command:- line(x1,y1,x2,y2)
x1,y1 specifies the location of point A and x2,y2 specifies the location of point B
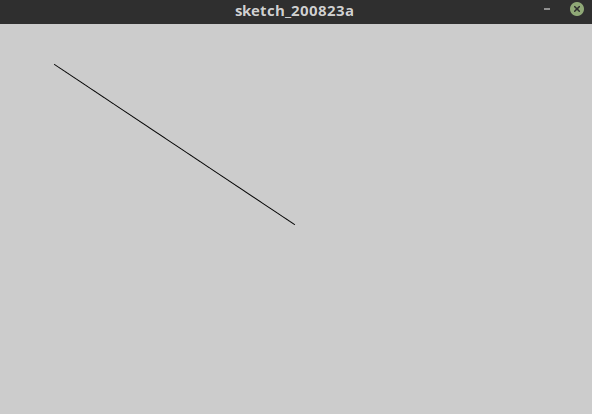
Go ahead type the below code in the processing editor and run the sketch.
Sketch 2 draw a line
|
1 2 3 4 5 6 |
function setup () { createCanvas (600,400); background (220); // draw line line (60, 40, 300, 200); }
|
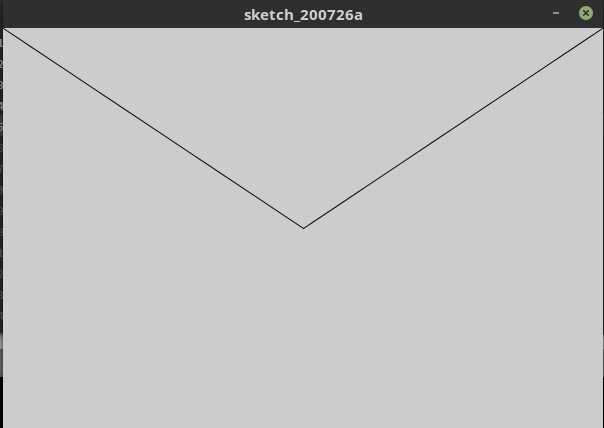
Create a sketch that will draw 2 lines as shown in the picture below..
Line 1 – from top left corner to the centre of the canvas
Line 2 – from the top right corner to the centre of the canvas
Hint:
How to draw line 1 ? Find the position (x,y) of the start point of the line (the top left corner) – 0,0. Find the position of the end point of the line (the centre of the canvas). The horizontal (x) centre is at the halfway point which is half the width of the canvas i.e. 600 / 2 = 300. The vertical centre (y) will be half the height i.e. 400/2 = 200.
Therefore location of the start point is 0,0 and the end point is 300,200
Draw line 1 by typing the following command
line(0,0,300,200);
In the same way find the start point and end point of line 2 and use the line command to draw line 2.
Sketch draw lines
|
1 2 3 4 5 6 7 8 |
function setup () { createCanvas (600,400); background (220); // draw line 1 line (0, 0, 300, 200); // draw line 2 line (599, 0, 300, 200); } |
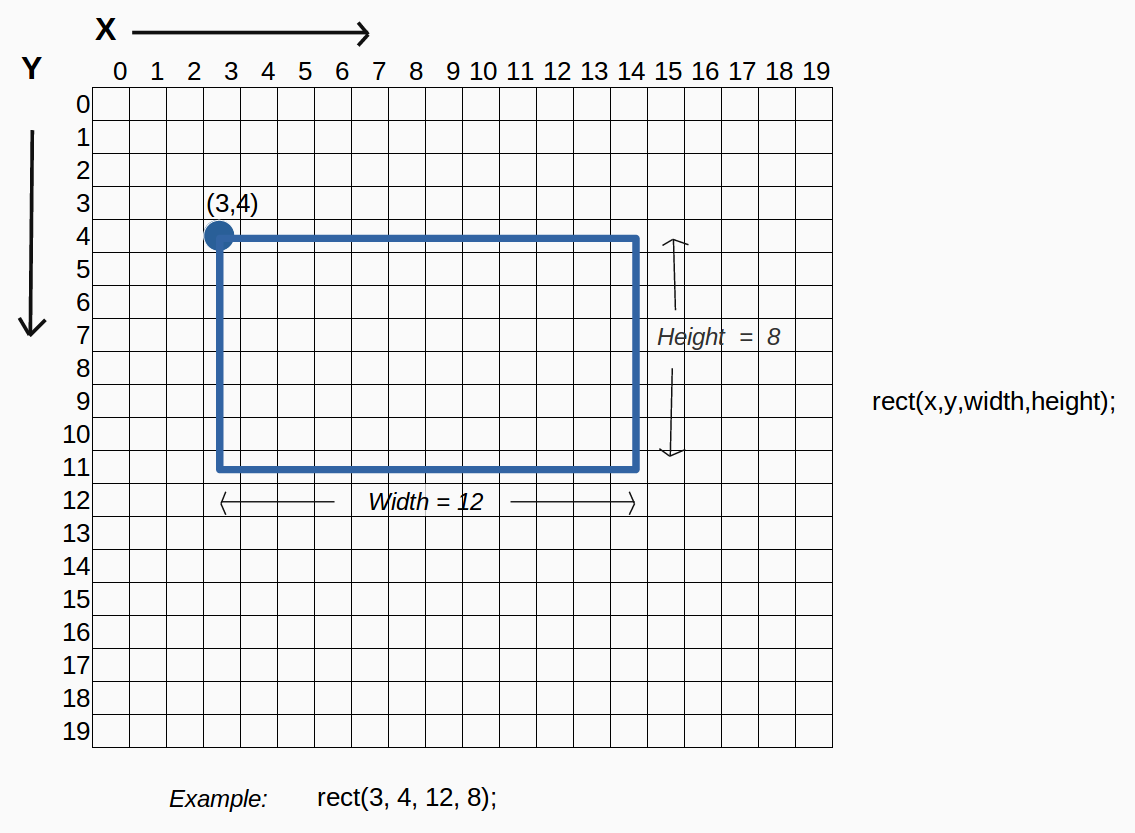
Drawing a Rectangle
We can draw a rectangle from with the rect() command which requires 4 parameters :- rect(x,y,width, height);
x and y specifies the position of the top left corner of the rectangle (See figure below) because processing draws rectangles from their top left corner